3/8/2017
 “It was in a pretty shabby condition; it was a divorce situation and the property had had no maintenance done on it for quite some time. It was very dark with dreary paint and was generally run-down. But it had potential, and it had a unique design, so that is what appealed to us,” Julie says.
“We paid $520,000 for the house. It was undervalued as the vendors were quite motivated to get out and move on; initially it was listed for $590,000 and had been on the market for nine months.”
After pouring their hearts and souls into the renovation, the couple saw every single room of the house transformed and the exterior overhauled. Then they had the property revalued and were pleasantly surprised.
In the midst of Perth’s downmarket, they were able to generate equity growth of more than $60,000.
“We have just had the place revalued and it came in at $640,000. We’re pretty happy with that! We were hoping for an equity gain so we could buy another place to renovate, and we actually made an awesome equity gain, so we know we can repeat the process on the next project,” Julie says.
“We will be looking for another project shortly, and again we will try and do the work ourselves wherever possible. Also, we will not go so far over budget the next time!”
SPECIAL INTERVIEW WITH JULIE
THE PROJECT
This family home located in Shoalwater, south of Perth, was a labour of love for owners Julie and Shelley, who renovated it while living there.
When the couple first viewed the property, they knew it would require a lot of work, but they were keen to dive in as DIY renovators anyway. “Our initial budget was around $35,000, but we did go over – surprise, surprise!” Julie laughs.
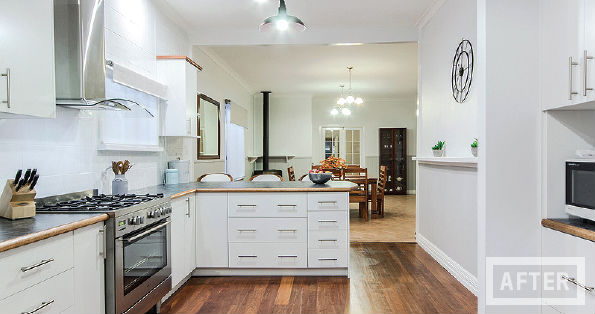
“We figured we were going to live here for a while, so we spent extra on the kitchen, plus we had a few other unexpected costs, which is always the case with older houses. The actual amount we spent in total on the reno was $57,500, but it would have been significantly more, had we not done a lot of the work ourselves.”
THE BUDGET: $57K
 STEP ONE: PLANNING PHASE
Before picking up a paintbrush, Julie and Shelley decided to create a strategy.
“We started working on a plan to upgrade the house and make the main living areas bigger and more user-friendly. We used a property mentor to help us decide where best we should spend our reno budget, and it was the best thing we ever did,” Julie says.
“We worked with Cathy Morrissey from Wollongong, who helped us to set up a
‘blueprint’ and work out the best way to move forward.”
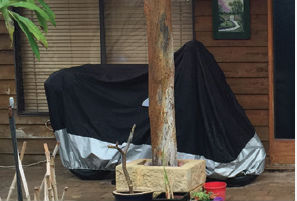
 STEP TWO: DECLUTTER
Before they got started, the couple decided to minimise all of their belongings to make the renovation process as smooth as possible. But they didn’t get rid of anything – they simply moved all of their non-essentials into storage.
 “It made a big difference to declutter the house before we started,” Julie says.
“We hired a storage shed locally and took everything that we didn’t need and stored it, so we had free space to get to walls and ceilings and so we could easily shift furniture. It was a great idea, as it was so much easier to work with less junk around.”
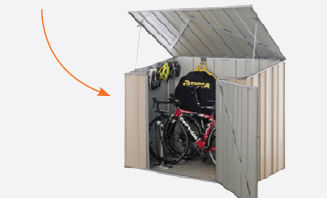 TOP TIP
For those who are renovating their own homes, a short-term storage space shouldn’t cost any more than a few hundred dollars, and can be a huge time and space saver during your renovation. Factor this small cost into your budget and you’ll reap the rewards.
 STEP THREE: LEVERAGE RESOURCES
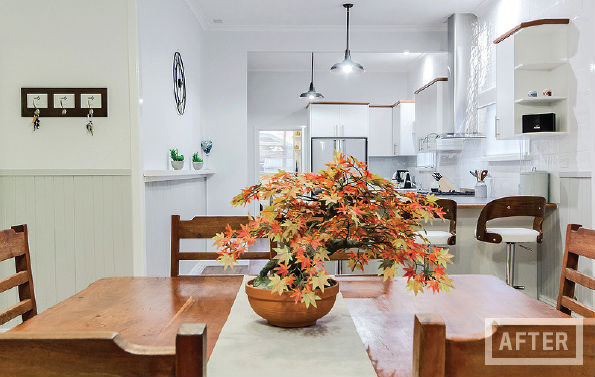
With a plan in place and a clean slate to work from, Julie and Shelley began looking for opportunities to save money, without sacrificing quality. For instance, when planning their kitchen remodel, the quotes ran up to $30,000.
“We decided that we should think outside the square, or we would have blown the entire budget just on the kitchen!” Julie says.
“Instead, we opted for a simple design and we actually had it made at Shelley’s work for cost price, so that saved us a lot. We had it installed by some tradies known to us. All up, it cost $10,000 for the kitchen and about $2,000 to install.”
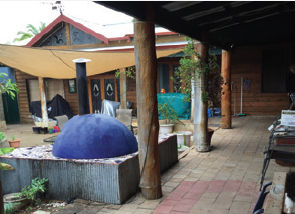
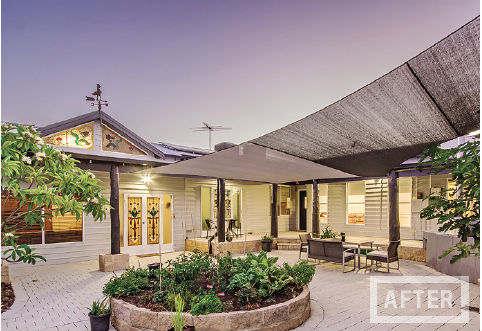
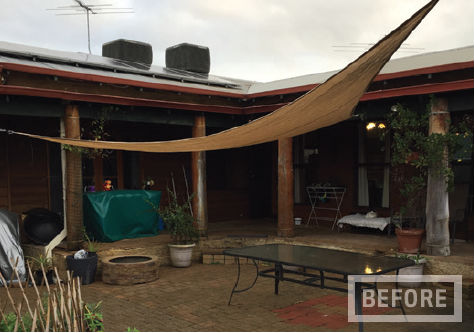 STEP FOUR: EXTERIOR UPGRADE
The exterior refresh of the home involved “painting, painting and more painting”.
“We paid professional painters to paint the outside. To put some perspective around this, we used over 180 litres of paint just on the outside paved areas! It took some time, but the results were amazing,” Julie says.
“It would have cost significantly more to replace the old, cracked pavers, so we repaired them and cleaned them, then painted them.”
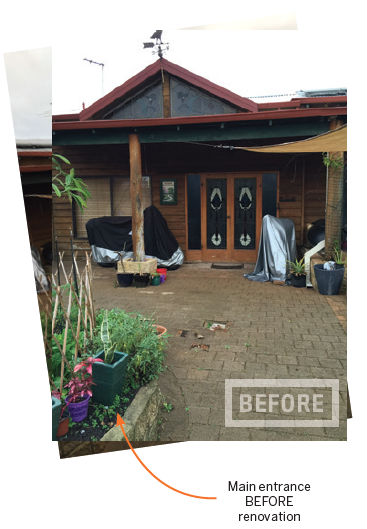
 STEP FIVE: FIRST IMPRESSIONS
As part of their plan to upgrade the exterior, Julie and Shelley focused on the front doors. First impressions count, so they paid particular attention to the front door, a beautiful leadlight French door that they returned to its former glory.
“It was a lot of hard work and elements of the renovation were a steep learning curve for Shell, but she was a trooper and learned a heap of new things along the way,” Julie says.
“She was prepared to get in and get dirty, and the results speak for themselves!”
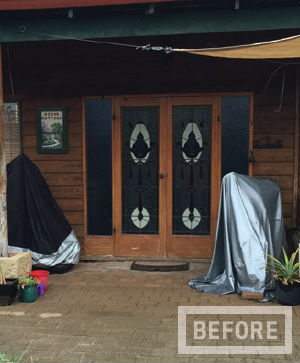
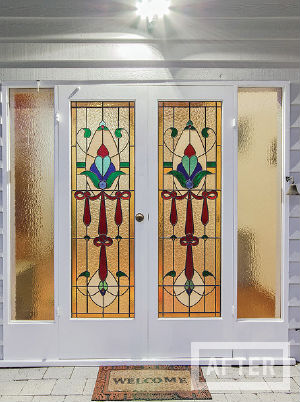
Light, bright, neutral tones draw the eye to the room’s best features – in this case, the beautiful leadlight window.
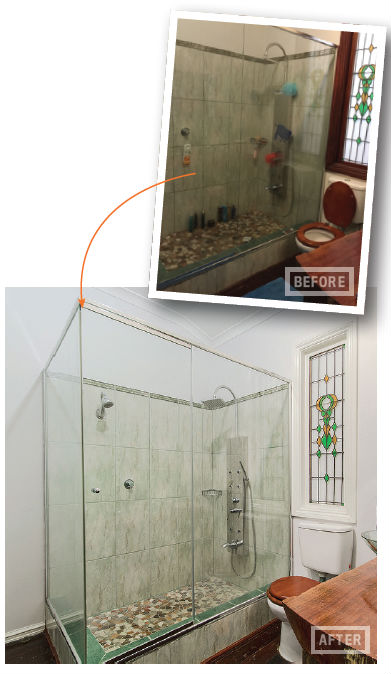 STEP SIX: BATHROOM REFRESH
The most expensive areas of any home renovation can be the kitchen and bathroom, but Julie and Shelley were aiming to keep costs down.
Just as importantly, everything in the bathroom was already functional and in decent condition. So they limited their bathroom upgrade to a simple, quick paint job.
“I cannot overemphasise the importance of paint and how choosing the right colours can make a massive difference to any project,” Julie says.
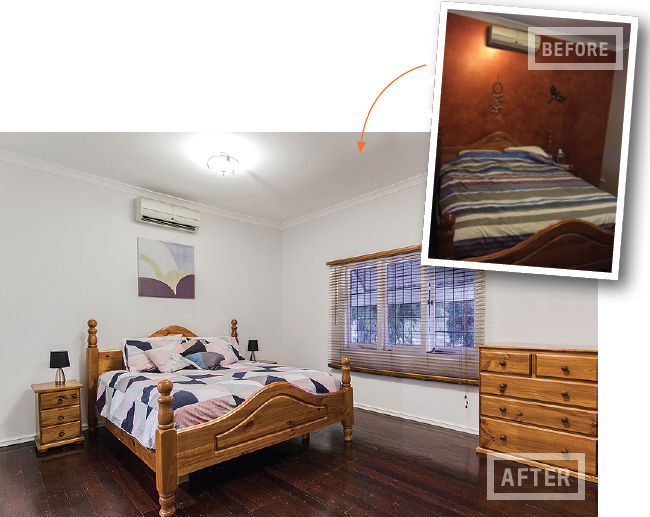 STEP SEVEN: BEDROOM FACELIFT
The bedrooms were already fitted out with beautiful hardwood floors, so refreshing these areas didn’t require much work. Again, it came back to painting out tired, dark colours to breath new life into the rooms.
“We paid professional painters to paint the outside and main living areas, but we painted the rest ourselves to save some money,” Julie says.
There was a brief issue when they engaged some painters on the recommendation of their main painter – the new team caused such a mess that Julie and Shelley wound up canning the job and reporting them to the Office of Fair Trading – but overall, they’re thrilled with the results.
 STEP EIGHT: STYLING
“The last thing I want to emphasise is that you should never underestimate styling a property, even if you are just going through the refinance process like we were,” Julie says.
“It can make a massive difference to the valuation amount. I never fully appreciated the difference it makes, but it was not that hard to do. We had Cathy’s advice and we also asked our sister-in-law, Robyn, to help, as she has an eye for colours and design.
“You don’t need to be an interior designer to get a fantastic look!”